How to Make a Bracelet from Paper Beads
One day, I came up with the idea to have my toddler daughter color white printer paper with markers that I could turn into paper beads for making jewelry. I cut this colored paper into ½-inch by 11-inch rectangular strips and rolled them into tubular beads. In this post, I will share how I turned them into a bracelet.
Supplies
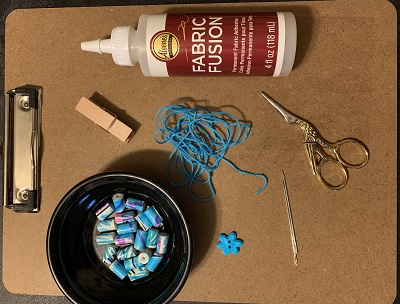
- 5-6 feet (depending on the finished bracelet size) of 6-string embroidery floss in your chosen color
- Button in complementary color
- Tubular beads – I used about 20 to make a 6” bracelet
- Jeweler's glue or clear nail polish
- Clipboard or flat surface and clear tape
- Scissors
- Sewing needles (optional)
- Clothespin (optional)
Instructions
Now that your supplies are gathered, you can assemble your bracelet. Let's get started!
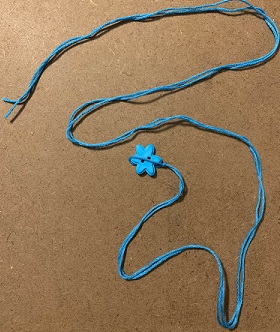
- Fold your embroidery floss in half so the ends are touching. Using your button to size the hole, tie an overhand knot at the loop end that just fits the longest width of your button.
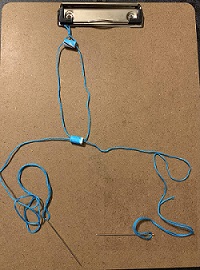
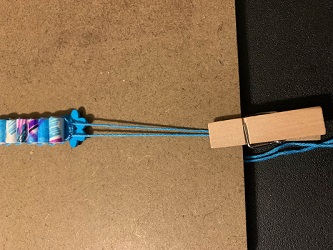
- Clip the loop on your clipboard or tape it to your flat surface.
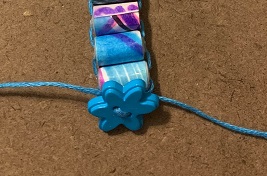
- Run the end of each string through the bead hole in opposite directions. Specifically, hold the bead so the hole ends are facing left and right. Then, put one string through the right side of the bead and the other string through the left side of the bead. Next, pull both strings so the bead pulls tightly against the loop knot. Continue doing this until all your beads are strung on the bracelet and the length of the bracelet from the end to the loop is the size you want it.
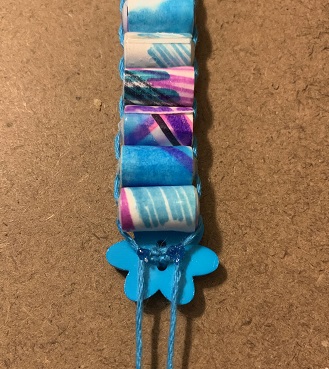
- Run the end of each string through the buttonholes from the back side to the front and, then, from the front to the back. If you have a four-hole button, run each string through two different holes so that all four holes are used once. If you have a two-hole button, start each string in a different hole on the back, then thread each through the opposite front hole. Pull your strings so the button is tight against the last bead on the bracelet and tie two overhand knots.
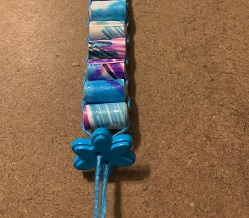
- Take each string end and make a double knot around the triangle string formed by the button and the beads. To add further security to these knots, apply a dab of clear nail polish or jeweler's glue to both knots. Take care not to glue the knots to the bead or the button.
- When the knots are dry, cut off the remaining ends of the string close to the knot, and try on your new bracelet.
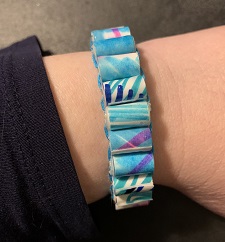
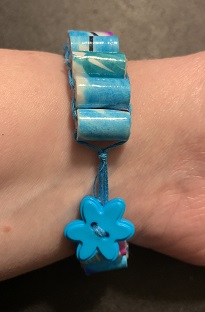
Your bracelet is complete! I hope you enjoyed making it.